INSTALL LARAVEL ON UBUNTU 17.04 / 17.10 WITH APACHE2, MARIADB AND PHP SUPPORT
Laravel is a flexible and lightweight open source PHP framework with Model-View Controller (MVC) design pattern. It can be a great alternative to CodeIgniter framework. Laravel is designed for ease of use to allow developers create great applications.
If you’re looking for a simple and straightforward PHP framework to design your next application, you’ll find Laravel to be useful. This brief tutorial is going to show students and new users how to install Laravel PHP framework on Ubuntu 17.04 / 17.10 with Apache2, MariaDB and PHP support.
To get started with installing Laravel, follow the steps below:
Step 1: Install Apache2
Laravel requires a webserver to function and the second most popular webserver in use today is Apache2. So, go and install Apache2 on Ubuntu by running the commands below:
sudo apt install apache2
Next, run the commands below to stop, start and enable Apache2 service to always start up with the server boots.
Run the commands below to install composer package and install.. you must have curl package installed for the commands to work.. if not, just run sudo apt install curl to install it…
Change into Laravel directory and run the commands below to download and install Laravel for th e project you want to create… name the project whatever you want… for this post, we’re calling it MyProject..
cd /var/www/html
sudo composer create-project laravel/laravel MyProject --prefer-dist
After running the commands above, a new project directory will be created… Run the commands below to set the correct permissions for that directory..
Finally, configure Apahce2 site configuration file for Laravel. This file will control how users access Laravel content. Run the commands below to create a new configuration file called laravel.conf
How To Set Up Apache Virtual Hosts on Ubuntu 16.04
Introduction
The Apache web server is the most popular way of serving web content on the internet. It accounts for more than half of all active websites on the internet and is extremely powerful and flexible.
Apache breaks its functionality and components into individual units that can be customized and configured independently. The basic unit that describes an individual site or domain is called a virtual host.
These designations allow the administrator to use one server to host multiple domains or sites off of a single interface or IP by using a matching mechanism. This is relevant to anyone looking to host more than one site off of a single VPS.
Each domain that is configured will direct the visitor to a specific directory holding that site’s information, never indicating that the same server is also responsible for other sites. This scheme is expandable without any software limit as long as your server can handle the load.
In this guide, we will walk you through how to set up Apache virtual hosts on an Ubuntu 16.04 VPS. During this process, you’ll learn how to serve different content to different visitors depending on which domains they are requesting.
Prerequisites
Before you begin this tutorial, you should create a non-root user as described in steps 1-4 here.
You will also need to have Apache installed in order to work through these steps. If you haven’t already done so, you can get Apache installed on your server through apt-get:
sudo apt-get update
sudo apt-get install apache2
After these steps are complete, we can get started.
For the purposes of this guide, our configuration will make a virtual host for example.com and another for test.com. These will be referenced throughout the guide, but you should substitute your own domains or values while following along.
We will show how to edit your local hosts file later on to test the configuration if you are using dummy values. This will allow you to test your configuration from your home computer, even though your content won’t be available through the domain name to other visitors.
Step One — Create the Directory Structure
The first step that we are going to take is to make a directory structure that will hold the site data that we will be serving to visitors.
Our document root (the top-level directory that Apache looks at to find content to serve) will be set to individual directories under the /var/www directory. We will create a directory here for both of the virtual hosts we plan on making.
Within each of these directories, we will create a public_html folder that will hold our actual files. This gives us some flexibility in our hosting.
For instance, for our sites, we’re going to make our directories like this:
sudo mkdir -p /var/www/example.com/public_html
sudo mkdir -p /var/www/test.com/public_html
The portions in red represent the domain names that we are wanting to serve from our VPS.
Step Two — Grant Permissions
Now we have the directory structure for our files, but they are owned by our root user. If we want our regular user to be able to modify files in our web directories, we can change the ownership by doing this:
The $USER variable will take the value of the user you are currently logged in as when you press Enter. By doing this, our regular user now owns the public_html subdirectories where we will be storing our content.
We should also modify our permissions a little bit to ensure that read access is permitted to the general web directory and all of the files and folders it contains so that pages can be served correctly:
sudo chmod -R 755 /var/www
Your web server should now have the permissions it needs to serve content, and your user should be able to create content within the necessary folders.
Step Three — Create Demo Pages for Each Virtual Host
We have our directory structure in place. Let’s create some content to serve.
We’re just going for a demonstration, so our pages will be very simple. We’re just going to make an index.html page for each site.
Let’s start with example.com. We can open up an index.html file in our editor by typing:
nano /var/www/example.com/public_html/index.html
In this file, create a simple HTML document that indicates the site it is connected to. My file looks like this:
/var/www/example.com/public_html/index.html
<html>
  <head>
    <title>Welcome to Example.com!</title>
  </head>
  <body>
    <h1>Success!  The example.com virtual host is working!</h1>
  </body>
</html>
Save and close the file when you are finished.
We can copy this file to use as the basis for our second site by typing:
We can then open the file and modify the relevant pieces of information:
nano /var/www/test.com/public_html/index.html
/var/www/test.com/public_html/index.html
<html>
  <head>
    <title>Welcome to Test.com!</title>
  </head>
  <body> <h1>Success!  The test.com virtual host is working!</h1>
  </body>
</html>
Save and close this file as well. You now have the pages necessary to test the virtual host configuration.
Step Four — Create New Virtual Host Files
Virtual host files are the files that specify the actual configuration of our virtual hosts and dictate how the Apache web server will respond to various domain requests.
Apache comes with a default virtual host file called 000-default.conf that we can use as a jumping off point. We are going to copy it over to create a virtual host file for each of our domains.
We will start with one domain, configure it, copy it for our second domain, and then make the few further adjustments needed. The default Ubuntu configuration requires that each virtual host file end in .conf.
As you can see, there’s not much here. We will customize the items here for our first domain and add some additional directives. This virtual host section matches any requests that are made on port 80, the default HTTP port.
First, we need to change the ServerAdmin directive to an email that the site administrator can receive emails through.
ServerAdmin admin@example.com
After this, we need to add two directives. The first, called ServerName, establishes the base domain that should match for this virtual host definition. This will most likely be your domain. The second, called ServerAlias, defines further names that should match as if they were the base name. This is useful for matching hosts you defined, like www:
The only other thing we need to change for a basic virtual host file is the location of the document root for this domain. We already created the directory we need, so we just need to alter the DocumentRootdirective to reflect the directory we created:
DocumentRoot /var/www/example.com/public_html
In total, our virtualhost file should look like this:
Now that we have created our virtual host files, we must enable them. Apache includes some tools that allow us to do this.
We can use the a2ensite tool to enable each of our sites like this:
sudo a2ensite example.com.conf
sudo a2ensite test.com.conf
Next, disable the default site defined in 000-default.conf:
sudo a2dissite 000-default.conf
When you are finished, you need to restart Apache to make these changes take effect:
sudo systemctl restart apache2
In other documentation, you may also see an example using the service command:
sudo service apache2 restart
This command will still work, but it may not give the output you’re used to seeing on other systems, since it’s now a wrapper around systemd’s systemctl.
Step Six — Set Up Local Hosts File (Optional)
If you haven’t been using actual domain names that you own to test this procedure and have been using some example domains instead, you can at least test the functionality of this process by temporarily modifying the hosts file on your local computer.
This will intercept any requests for the domains that you configured and point them to your VPS server, just as the DNS system would do if you were using registered domains. This will only work from your computer though, and is simply useful for testing purposes.
Make sure you are operating on your local computer for these steps and not your VPS server. You will need to know the computer’s administrative password or otherwise be a member of the administrative group.
If you are on a Mac or Linux computer, edit your local file with administrative privileges by typing:
The details that you need to add are the public IP address of your VPS server followed by the domain you want to use to reach that VPS.
For the domains that I used in this guide, assuming that my VPS IP address is 111.111.111.111, I could add the following lines to the bottom of my hosts file:
This will direct any requests for example.com and test.com on our computer and send them to our server at 111.111.111.111. This is what we want if we are not actually the owners of these domains in order to test our virtual hosts.
Save and close the file.
Step Seven — Test your Results
Now that you have your virtual hosts configured, you can test your setup easily by going to the domains that you configured in your web browser:
http://example.com
You should see a page that looks like this:
Likewise, if you can visit your second page:
http://test.com
You will see the file you created for your second site:
If both of these sites work well, you’ve successfully configured two virtual hosts on the same server.
If you adjusted your home computer’s hosts file, you may want to delete the lines you added now that you verified that your configuration works. This will prevent your hosts file from being filled with entries that are not actually necessary.
Setup Apache2 Userdir Module On Ubuntu 16.04 LTS Servers
In most school environments is where you get to see Apache2 Userdir in action… each teacher is given his/her own website where he/she can publish materials for students to access… The URL to reach the teacher’s page is usually the domain name followed by /~teacher_name..
User Directory or Userdir for short is a module for Apache2 web server that allows user-specific directories to be accessed via Apache2. For example, when you enable this feature in Apache2, users with accounts on the system will be able to share content in their home directories with the world via Apache2..
This brief tutorial shows students and new users how to enable and configure it on Ubuntu 16.04 LTS Servers using Apache2…
To get started with enabling Userdir on Ubuntu 16.04 LTS, the steps below is a good place to start:
This tutorial assumes that you already have Apache2 web server installed. If you haven’t, you may want to do that before continuing below.
Step 1: Install Apache2 HTTP Server
First, run the commands below to install Apache2 HTTP Server on Ubuntu
sudo apt install apache2
Step 2: Enabling Userdir On Apache2
To enable Userdir module for Apache2 webservers, run the commands below
sudo a2enmod userdir
After running the commands above the feature will be enabled and ready to be used. The configuration file is at /etc/apache2/mods-enabled/userdir.conf. But you don’t have to do anything. It’s already configured with the best options.
Now that the feature is enabled, all users have to do is run the commands below to create a folder in their home directories called public_html by running the commands below.
mkdir ~/public_html
In the ~/public_html folder, create html documents to be shared and accessed via the webserver.
Restart Apache2 webserver to load the settings.
sudo systemctl restart apache2.service
Now test it out by browsing to the server hostname or IP address followed by the username.
example: http://example.com/~richard
This is how Apache2 Userdir module is configured for users to allow users with accounts on the systems to share content from their home directories..
Installing LAMP (Linux, Apache, MariaDB, PHP/PhpMyAdmin) in RHEL/CentOS 7.0
Step 1: Install Apache Server with Basic Configurations
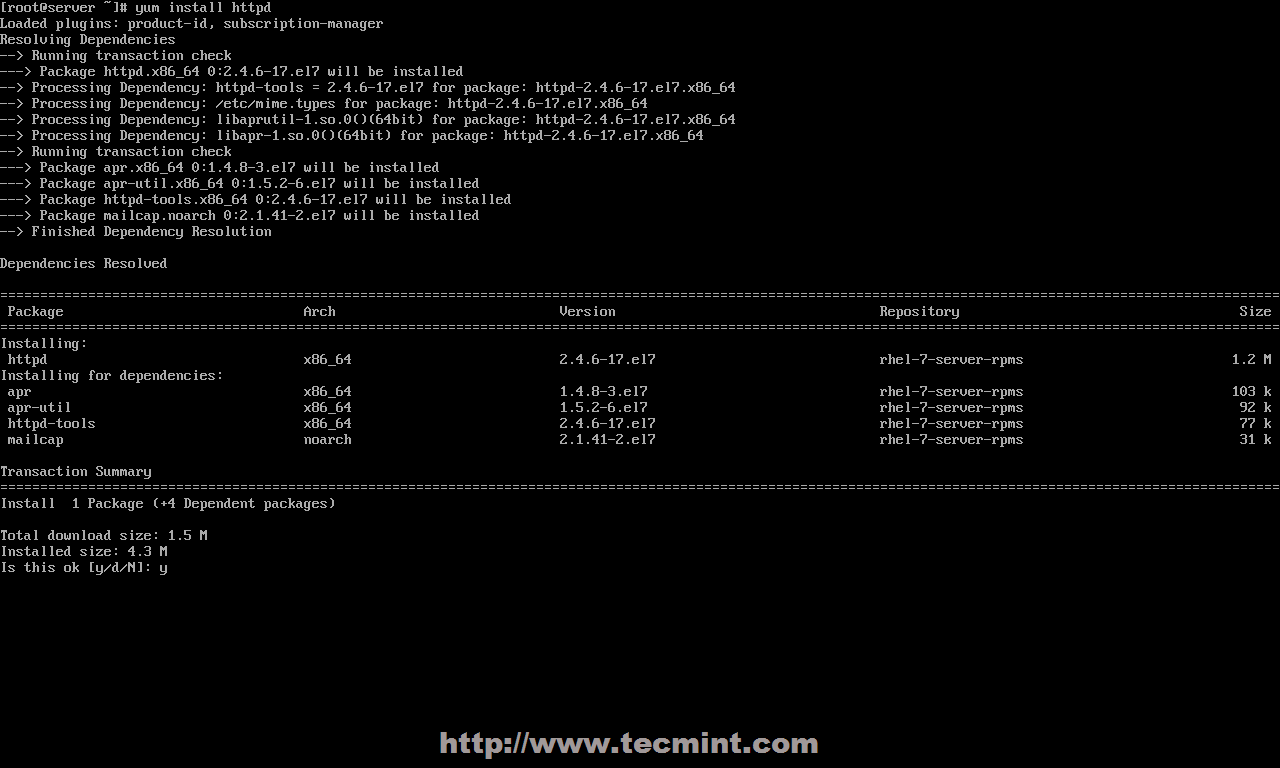
1. After performing a minimal system installation and configure your server network interface with a Static IP Address on RHEL/CentOS 7.0, go ahead and install Apache 2.4 httpd service binary package provided form official repositories using the following command.
# yum install httpd
Install Apache Web Server
2. After yum manager finish installation, use the following commands to manage Apache daemon, since RHEL and CentOS 7.0 both migrated their init scripts from SysV to systemd – you can also use SysV and Apache scripts the same time to manage the service.
# systemctl status|start|stop|restart|reload httpd

OR

# service httpd status|start|stop|restart|reload

OR

# apachectl configtest| graceful
Start Apache Web Server
3. On the next step start Apache service using systemd init script and open RHEL/CentOS 7.0 Firewall rules using firewall-cmd, which is the default command to manage iptables through firewalld daemon.
# firewall-cmd --add-service=http
NOTE: Make notice that using this rule will lose its effect after a system reboot or firewalld service restart, because it opens on-fly rules, which are not applied permanently. To apply consistency iptables rules on firewall use –permanent option and restart firewalld service to take effect.
4. To verify Apache functionality open a remote browser and type your server IP Address using HTTP protocol on URL (http://server_IP), and a default page should appear like in the screenshot below.
Apache Default Page
5. For now, Apache DocumentRoot path it’s set to /var/www/html system path, which by default doesn’t provide any index file. If you want to see a directory list of your DocumentRoot path open Apache welcome configuration file and set Indexes statement from – to + on <LocationMach> directive, using the below screenshot as an example.
# nano /etc/httpd/conf.d/welcome.conf
Apache Directory Listing
6. Close the file, restart Apache service to reflect changes and reload your browser page to see the final result.
# systemctl restart httpd
Apache Index File
Step 2: Install PHP5 Support for Apache
7. Before installing PHP5 dynamic language support for Apache, get a full list of available PHP modules and extensions using the following command.
# yum search php
Install PHP in CentOS 7
8. Depending on what type of applications you want to use, install the required PHP modules from the above list, but for a basic MariaDB support in PHP and PhpMyAdmin you need to install the following modules.
9. To get a full information list on PHP from your browser, create a info.php file on Apache Document Root using the following command from root account, restart httpd service and direct your browser to the http://server_IP/info.php address.
10. If you get an error on PHP Date and Timezone, open php.ini configuration file, search and uncomment date.timezone statement, append your physical location and restart Apache daemon.
11. Red Hat Enterprise Linux/CentOS 7.0 switched from MySQL to MariaDB for its default database management system. To install MariaDB database use the following command.
# yum install mariadb-server mariadb
Install MariaDB in CentOS 7
12. After MariaDB package is installed, start database daemon and use mysql_secure_installation script to secure database (set root password, disable remotely logon from root, remove test database and remove anonymous users).
13. To test database functionality login to MariaDB using its root account and exit using quit statement.
mysql -u root -p
MariaDB > SHOW VARIABLES;
MariaDB > quit
Connect MySQL Database
Step 4: Install PhpMyAdmin
14. By default official RHEL 7.0 or CentOS 7.0 repositories doesn’t provide any binary package for PhpMyAdmin Web Interface. If you are uncomfortable using MySQL command line to manage your database you can install PhpMyAdmin package by enabling CentOS 7.0 rpmforge repositories using the following command.
After enabling rpmforge repository, next install PhpMyAdmin.
# yum install phpmyadmin
Enable RPMForge Repository
15. Next configure PhpMyAdmin to allow connections from remote hosts by editing phpmyadmin.conf file, located on Apache conf.d directory, commenting the following lines.
# nano /etc/httpd/conf.d/phpmyadmin.conf
Use a # and comment this lines.
# Order Deny,Allow
# Deny from all
# Allow from 127.0.0.1
Allow Remote PhpMyAdmin Access
16. To be able to login to PhpMyAdmin Web interface using cookie authentication method add a blowfish string to phpmyadmin config.inc.php file like in the screenshot below using the generate a secret string, restart Apache Web service and direct your browser to the URL address http://server_IP/phpmyadmin/.
That’s all it takes for a basic LAMP installation on Red Hat Enterprise 7.0 or CentOS 7.0. The next series of articles related to LAMP stack on CentOS/RHEL 7.0 will discuss how to create Virtual Hosts, generate SSL Certificates and Keys and add SSL transaction support for Apache HTTP Server.
Find the Files category and click on the File Manager icon.
In the top right hand corner, click on Settings. For the primary domain, click on the Web Root radio button. For addon domains, click on the dropdown and find your desired addon domain name. Be sure the checkbox next to Show Hidden Files is checked. Click the Save button to return to the main File Manager screen.
You should now be in the root folder of the domain you chose. Look for the .htaccess file and right click on it. This brings up a menu. Find and click on the Edit option. If you get a popup box, simply find and click the Edit button in the lower right corner to continue to the editor.
You are now in the text editor. As most sites are coded with either htm or php, we have include the code for both below. RewriteEngine on RewriteCond %{REQUEST_FILENAME} !-d RewriteCond %{REQUEST_FILENAME}\.php -f RewriteRule ^(.*)$ $1.php RewriteEngine on RewriteCond %{REQUEST_FILENAME} !-d RewriteCond %{REQUEST_FILENAME}\.html -f RewriteRule ^(.*)$ $1.html
Be sure to hit the Save Changes button in the upper right corner to save your new htaccess configuration. Your site should now display the address without the file extension.


