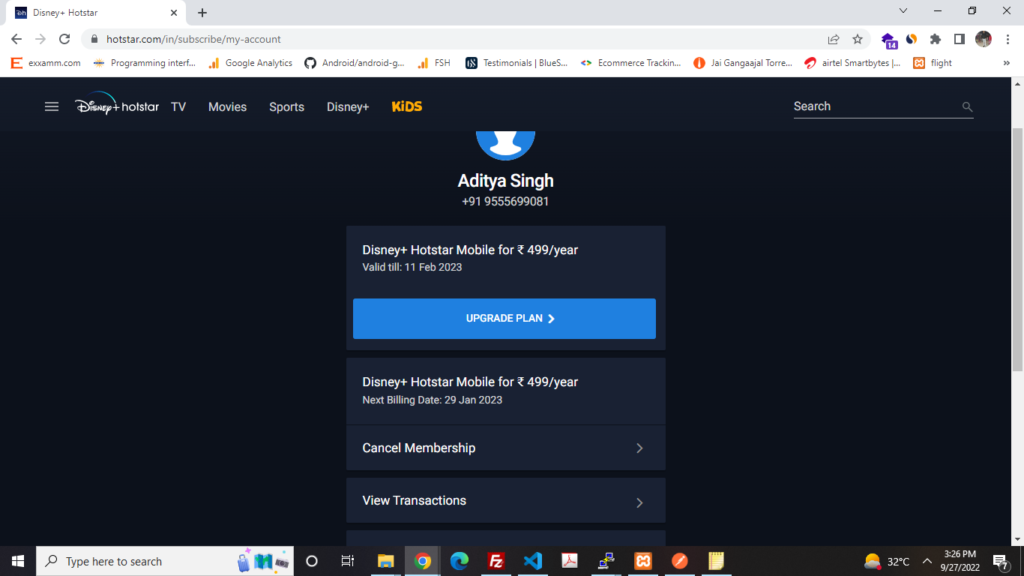
You can see your billing history by clicking on ‘View Transactions’ in My Account section on Hotstar website. You will also be able to access invoices for all successful payments from this section.
Please sign in to the website, go to the ‘My Account’ section, and double click on ‘Completed’ under view transaction. You will find your invoice there which can be viewed and downloaded for reference.
Click on WhatsApp Accounts under the Accounts menu, then select your WhatsApp Account from the WhatsApp Accounts list, if it isn’t already highlighted.
Go to the Settings tab, and click the WhatsApp Manager button.
Under the Phone Numbers tab, you should see your phone numbers listed. Click the View button of the phone number you want the certificate for.
mod_userdir allows accessing a user’s homepage using the temporary URL with the /~user/ syntax, like http://ipaddress/~user where ‘ipaddress’ may be replaced with the server’s hostname or any domain name that is resolved to the server you wish to check the content on.
What is Mod_userdir?
mod_userdir. The UserDir directive sets the real directory in a user’s home directory to use when a request for a document for a user is received.
How to Enable mod_ UserDir?
Enable access. To enable mod_userdir access, perform the following steps: Select the Enable mod_userdir Protection checkbox. To enable mod_userdir functionality for specific hosts, select the appropriate Exclude Protection checkboxes.
You can delete your account from within WhatsApp. Deleting your account is an irreversible process, which we can’t revert even if you perform it by accident.
To delete your account
Open WhatsApp.
Tap More options > Settings > Account > Delete my account.
Select a reason for why you’re deleting your account in the dropdown.
Tap DELETE MY ACCOUNT.
Deleting your account will:
Delete your account from WhatsApp.
Erase your message history.
Delete you from all of your WhatsApp groups.
Delete your Google Drive backup.
If you delete your account:
You can’t regain access to your account.
It may take up to 90 days from the beginning of the deletion process to delete your WhatsApp information. Copies of your information may also remain after the 90 days in the backup storage that we use to recover in the event of a disaster, software error, or other data loss event. Your information isn’t available to you on WhatsApp during this time.
It doesn’t affect your information related to the groups you created or the information other users have relating to you, such as their copy of the messages you sent them.
We may retain certain log data in our databases even after you delete your account, but such data will be disassociated from any identifying information such that it can no longer be linked to your account. To do this, on a regular basis, we wipe certain identifying information from this log data, and we replace any instance of your account ID with a replacement identifier which cannot be linked back to your account once it is deleted.
We may also keep your information for things like legal issues, terms violations, or harm prevention efforts.
Please refer to our Privacy Policy for more information.
Your information shared with other Meta Companies will also be deleted.
This driver file contains drivers, application to install the driver follow instructions below.
supported os Windows 7 (32-bit), Windows 7 (64-bit), Windows 8 (32-bit), Windows 8 (64-bit), Microsoft Windows 8.1 (32-bit), Windows 8.1 (64-bit), Windows 10 (32-bit), Windows 10 (64-bit), Windows vista (32-bit), Windows vista (64-bit), Windows XP (32-bit), Windows XP (64-bit)
Connect your PC to the Internet while performing the following Installation Procedures
1. Download the Canon PIXMA E470 Driver file.
2. Double-click the downloaded .exe file
3. Follow the instructions to install the software and perform the necessary settings.
Canon PIXMA E470 series Full Driver & Software Package for Windows Download (16.16 MB)
Canon PIXMA E470 Series MP Drivers for Windows Download (68.25 MB)
Canon PIXMA E470 Series XPS Printer Driver for Windows Download (20.67 MB)
Canon PIXMA E470 Windows Printers and Multifunction Printers security patch for Windows Download (42.41 KB)
supported os Mac OS Catalina 10.15.x, macOS Mojave 10.14.x, macOS High Sierra 10.13.x, macOS Sierra 10.12.x, Mac OS X El Capitan 10.11.x, Mac OS X Yosemite 10.10.x, Mac OS X Mavericks 10.9.x, Mac OS X Mountain Lion 10.8.x, Mac OS X Lion 10.7.x
Connect your PC to the Internet while performing the following Installation Procedures
1. Download the Canon PIXMA E470 driver file.
2. Double-click the downloaded file, the Setup screen will be displayed.
3. Double-click the “Setup” file by following the instructions to install the software.
4. Perform the necessary settings.
Canon PIXMA E470 Series CUPS Printer Driver for Mac Download (14.70 MB)
Canon PIXMA E470 series Full Driver & Software Package for Mac Download (10.18 MB)
Canon PIXMA E470 ICA Driver for Mac Download (2.46 MB)
Canon PIXMA E470 is a Wireless Office All-In-One Printer.